


Last updated: January 2026

If your old towel radiator valves are starting to leak or are outdated and need an update, this simple guide will show you how to change a radiator valve step-by-step. Whether you're replacing a manual valve with a thermostatic radiator valve or need to know how to replace a faulty one, this guide will help you get the job done quickly and easily.
When it comes to replacing your heated towel rail or radiator valve, it's not as tough as you would imagine. Despite their relatively small size, radiator valves have a significant impact on the efficiency of your central heating system. It ensures that heat transfer takes place effectively, ensuring that rooms are heated to the ideal temperature and saving you money on your heating bills.
It is important to note that, unless you are comfortable taking on more challenging DIY jobs, you should contact a trained tradesperson to address any plumbing or heating issues in your home. Today we will briefly discuss how to change your towel radiator valve, so take a look at it. Here is some quick information about radiator valves.
What kinds of radiator valves are there?
When replacing a radiator or heated towel rail, it's simple to forget about your valves. You usually pay close attention to the radiator alone, but choosing the valve is also crucial.
As soon as you begin looking around for a new valve, you'll realize there are many alternatives. Finding the ideal style, whether traditional, modern, or contemporary, is simple enough. But which one is best for your radiators and central heating system?
We've included some of the most popular selections below to help you make a far more informed choice when purchasing a new valve.
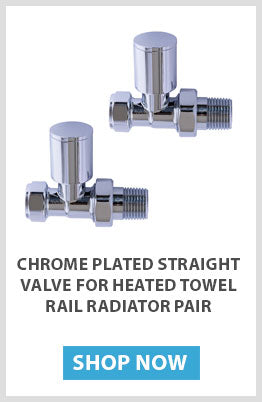
- Straight valves:
Straight valves receive their name since the water entering them does not pass through any angles or other diversions. These are perfect for radiators when the pipe enters the radiator straight from the wall. They also function on piping that rises through the floor as an alternative.
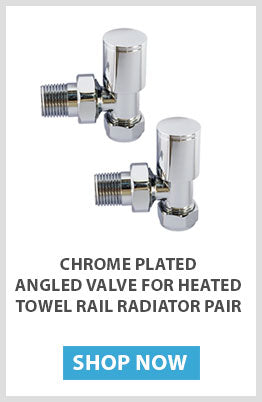
- Angled Valves:
Angled radiator valves are a common type of valve found in UK homes. The valve is positioned at around 90 degrees to the central heating pipe. Pipework from the floor or wall is usually best suited to these valves. They are very popular in minimalist, contemporary-style homes, where most pipework is concealed.
Angled valves offer several advantages over other types of valves. They are easier to install and provide a more stylish look for your home. If you want a way to add a touch of class to your home, angled valves may be the perfect solution.
- H-Block Valves:
If you're looking for a valve with your middle or central connection radiator, then an H-Block valve is the best option. These valves sit underneath the radiator and are less intrusive than other valves. They're also easier to install, making them an excellent choice for do-it-yourselfers.
- Corner Radiator Valves:
Corner radiator valves, also called flat front valves, are often chosen for purely aesthetic reasons. The top of the valve doesn't point outwards - like an angled valve - but instead faces inwards and is parallel with the wall. These can be a little more difficult to adjust than straight valves, so keep this in mind when making your decision.
Steps to Change towel radiator valves:
There are several steps to change towel radiator valves if you decide to change them in your house. So keep connected with these steps to replace them or install them perfectly without a professional. Let's have a look at it:
- Turn off the water supply and the boiler:
Before you start, turn the water supply off to your heating system and turn off your boiler - if you're not sure how this works, you may want to turn off your electricity.
If you need assistance, always seek expert assistance. When the pump fails, a dry system might overheat your boiler and perhaps burn out the pump itself. Call a heating engineer if you have questions about your system's work.
- Drain excess water using the drain off:
Your drain-off point is usually positioned on the bottom floor of your home, beneath the radiator. It enables you to drain any extra water before replacing the valve. Connect a hosepipe to the drain and feed the pipe out the nearest window.
To catch any leaks, place a cloth underneath the drain. Once the hose is securely positioned, use an adjustable spanner (or star key) to release the water.
- Remove all radiator bleed keys:
It would help if you now used a radiator bleed key to open all of the bleed keys on each radiator in your home. The bleed key is located on the top of your radiator and enables air into the system. You should hear a gentle hissing noise as air travels into your radiator.
This step is critical because it prevents water from entering your heating system by forcing it to the bottom of your radiator. After you've unlocked all bleed keys, let them drain for around 15 minutes.
- Taking off the old radiator valve:
Using a spanner, unscrew the top nut of your old radiator valve after laying a towel below it. Repeat with the bottom nut. By holding the valve body with the wrench, you should be able to take the valve out. A tiny amount of water will naturally leak out.
Remove the tail that links the valve to your radiator with your wrench. It can be difficult to gain leverage here, so use a spanner if necessary. If you notice a lot of water draining, reconnect the hosepipe for a few minutes until it's entirely drained.
- Installing the new radiator valve:
Replace the old radiator tail with the new one, then screw on the nut and olive. Before attaching the olive, slide the nut onto the water pipe.
Connect the new radiator valve to the water pipe while inserting it into the radiator tail. Once in place, tighten the tail nut and the one on the bottom of the water pipe using your wrench. The key here is ensuring the tail nut is securely fastened but not so tight that it is difficult to undo.
Connect the top of the valve to the valve body after removing the cap from the top of the valve body. Once in place, tighten it with your spanner, careful not to overtighten it.
- Reconnect your water supply:
Before turning on the water, close all the radiator valves, including the bleed valves. Make a mental note of how many times you have to turn your lockshield before it closes, as you'll need to open it with the same number of turns later.
When you're confident that all the radiator valves in your home have been turned off, turn the water back on. The water should now start flowing back into your heating system. Remember to inspect each radiator in your home to ensure no leaks!
- Bleed Your Radiator:
Once you're confident there are no leaks, bleed your radiator with extra air to keep water from filling up your heating system. Next, open your lockshield valve with the same number of twists you used to close it previously. The water can now flow freely once more.
- Restart your boiler:
Now it's time to restart your boiler and see if your hard work has paid off! Once turned on, wait about 90 minutes before performing a spot-check on each radiator to ensure they are heating up and in good working order.
If you have any issues, remember that it could be due to the radiator rather than the replacement valve. If you are doubtful, always seek expert assistance.
FAQs:
Can I change the radiator valve on my own?
If you consider yourself an experienced do it and feel comfortable with most radiator-related tasks, changing a radiator valve if you have a combi boiler system should be pretty straightforward.
What is the purpose of radiator valves?
The two valves of a towel radiator allow you to control the flow of hot water as well as the amount of heat it emits. The rate at which hot water enters the towel radiator is controlled by a single valve. The other valve controls how quickly hot water exits the radiator.
Is it possible to replace a radiator valve without draining the system?
Replacing radiator valves without draining your central heating system is possible with a few essential extra tools (bungs), a reasonably maintained heating system, and a touch of luck!

Ibrahim Kalay
Founder, Elegant Radiators
Heating specialist since 2014. Ibrahim founded Elegant Radiators from our Coventry warehouse (CV7 9NH), supplying thousands of UK homes with quality designer radiators and towel rails. His hands-on experience with BTU calculations, installation requirements, and product specifications informs every article on this blog.
Comments